How to take full control of your Control Center in macOS Tahoe

With MacOS Tahoe, Apple has made a drastic improvement in the control center: you can now add, delete and reorganize its commands. This represents a significant change compared to the previous versions, where certain controls were permanently located in the control center, the options for adding controls were limited and the order could not be reorganized.
In this article, we will examine how you can add checks, delete those you don’t want and organize them in a way that is logical to you. You can consult our superguid Tahoe macos for more information and tutorials. Here’s how to customize the control center in MacOS Tahoe.
- Tools required: MacOS Tahoe
The modification button

Foundry
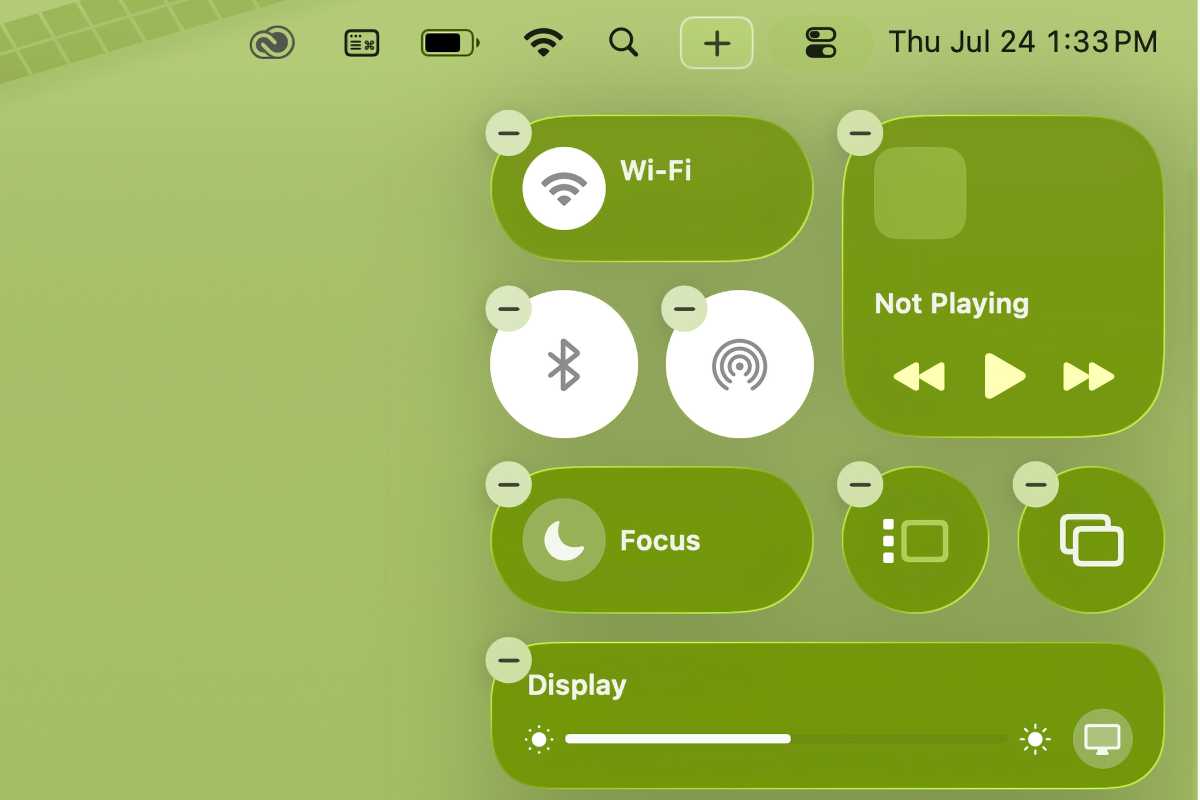
Before MacOS Tahoe, the control center was managed in the system settings, and your options had to activate or deactivate the controls. This is no longer the case in Tahoe. Now there is a Change checks Bout at the bottom of the control center. This button is the key to access the tools to manage the control center.
Now that you know where the control center is adjusted, let’s look at how to remove, add and reorganize the control center.
Remove controls from the control center
Foundry
Apple includes a set of default controls which, according to him, are the most popular with users. There is a little room so that you can add checks, but you can delete the commands you never use and create more space. For example, I never use Focus (which uses two locations; we will talk about locations in the “Reorganization of controls” section), so I removed it.
To delete a check, open the control center and click Change checks button. You will see “-” icons appear on the controls of the control center. It is like removing applications from the home screen in iOS; To delete a control, click on the “-” Corresponding control icon.
Add controls to the control center
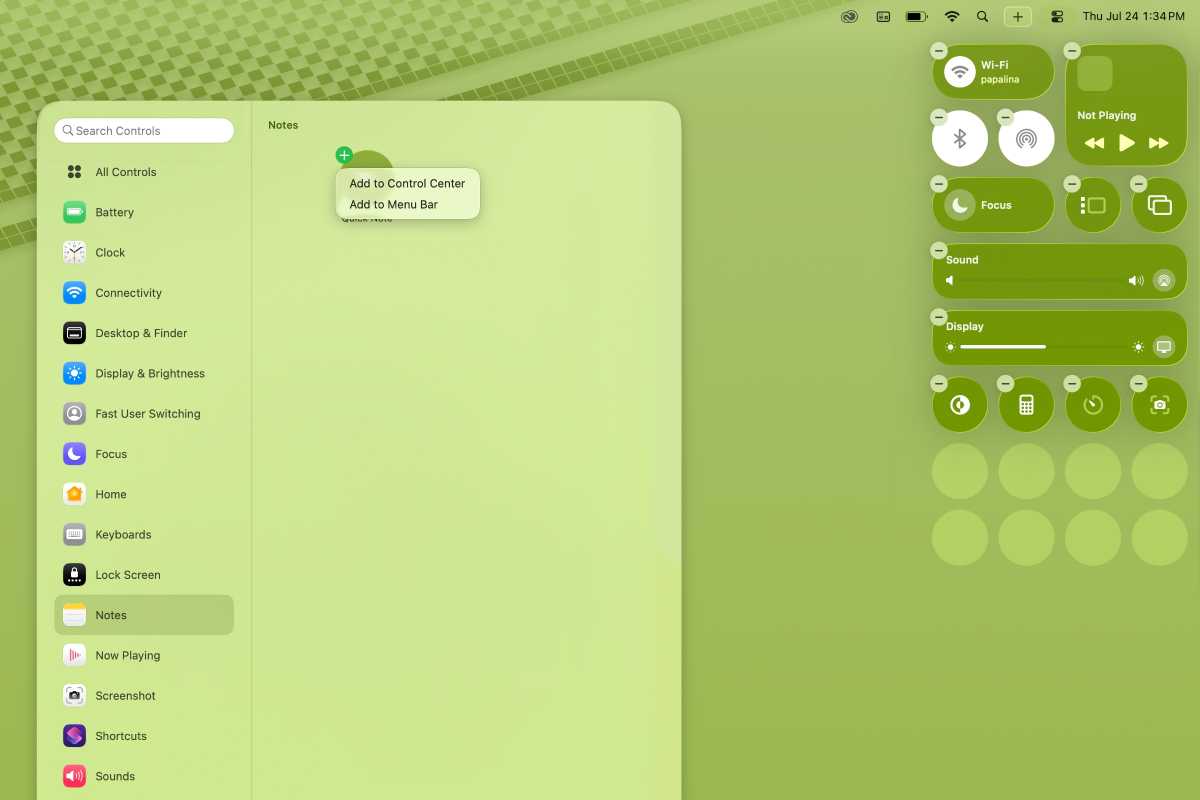
Foundry
To add a check, click Change checks. In the middle of the screen, you will see a gallery of controls that resembles the Widgets gallery. Browse the gallery and when you find a control you want, click on it. A contextual menu appears, asking if you want to add it to the control center or the menu bar. When you choose Control Center, it is added to an available location.
Some checks have additional options for the menu bar. For example, reading can now be added to the control center or to the menu bar with options for Always show,, Show when activeOr Never show.
The control gallery offers only Apple orders. There is no option to add developer or third -party applications checks. Hopefully this will change in future update.
Reorganize orders at the control center
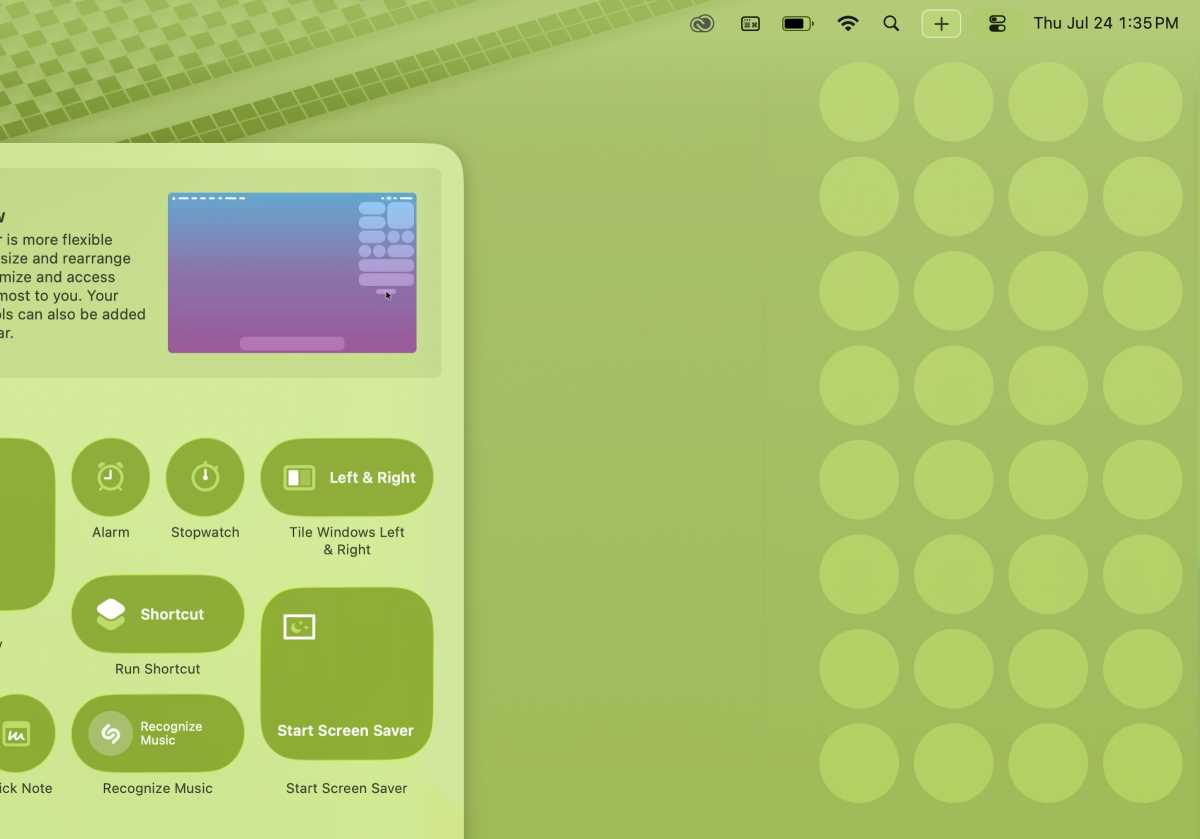
Foundry
To move the location of a check, click and drag it to the desired location. It’s as simple as that.
To dive a little deeper, let’s go how the layout works. The control center is made up of 32 spots in a rectangular grid. Orders occupies the tasks of the grid and how many spots that the commands occupy depends on its design. Certain orders take only one place, while others are as large as four points, is square or horizontally.
When you organize your orders, you can assemble them like a puzzle, but you are free to leave stains open if you wish. You can reorganize them when you wish.


")