I finally paired Home Assistant with my Immich photo server, and I wish I’d done it sooner


Immich is a self-hosted, open-source photo and video backup solution, intended as an alternative to Google Photos and iCloud Photo Library. I’ve used Immich for some time to back up photos and videos, but I’d never thought of connecting it to Home Assistant. Now I wish I’d tried it sooner.

I’m Running Home Assistant on a Mac Mini, Here’s How It Works
Home Assistant is right at home on Apple’s smallest, cheapest, and most energy-efficient Mac.
Installing the Immich integration
Connect Home Assistant to your Immich server
Home Assistant has an Immich integration that you can use to connect to your Immich server. Once connected, you can use Home Assistant to access photos from Immich. You can also upload images from Home Assistant to Immich.
To connect Home Assistant to Immich, you’ll need to generate an API key. In Immich, click your profile icon, and select Account Settings. Choose API Keys and click the New API Key button. Give the API key a name and select the permissions you want to grant. You must grant the following permissions for the integration to work properly:
- album.read
- albumAsset.create
- asset.download
- asset.upload
- asset.view
- person.read
- server.about
- server.statistics (admin-only)
- server.storage
- server.versionCheck
- tag.read
- user.read
You may need to add all permissions if you’re running an older version of Immich. Click Create and copy the API key. You must copy it at this point; once you close the window, you can’t access it again.
To install the Immich integration, go to Settings > Devices & services > Integrations, and click the Add integration button. Search for Immich and select the Immich integration. Enter the URL of your Immich server and the API key that you copied from Immich. Click Submit, and a new Immich device will be created, which you can name and assign to an area.
Using the Immich integration
Use Immich images in your dashboards

The official Immich integration is fairly limited, but it does add some useful features to Home Assistant. One of the most useful is that you can choose images directly from your Immich library when you want to add an image to a Home Assistant dashboard. When you choose Pick media to add an image, you’ll see an Immich option that lets you browse and select images from Immich.
Another useful feature is that you can work the other way and upload images from Home Assistant into Immich. If you take snapshots of your video doorbell when motion is detected, for example, you can upload these to Immich so that you don’t need to store them within Home Assistant for any length of time.
Making an Immich screensaver
My Echo Show is far less dull

One thing that you can’t easily do with the official Immich integration is create a randomized slideshow. I wanted to do this so that I could display it on my jailbroken Echo Show 5 using Fully Kiosk Browser. I could then mimic the slideshow screensaver feature of the Echo Show without having to share my photos with Amazon.
While the Immich integration doesn’t make this easy, there are some custom integrations that do. I used the Immich Picture integration, which offers five different photo sources. Random Assets fetches a random selection of photos each cycle, All Assets (Recent) fetches the most recent assets, Album Assets lets you select a specific album, Favorite Assets fetches photos marked as favorites, and Search by Metadata lets you use a JSON metadata query to filter by things such as country, creation date, OCR text content, camera make and model, and more.
I set up a dedicated album in Immich for landscape photos that I wanted to display on my Echo Show and use the Album Assets option. This generates a camera entity that updates at a set frequency using images from the designated album. I was then able to add this camera entity to a Picture Entity card in a dashboard and display that dashboard on my Echo Show.
Now I get a randomized slideshow of my album images on my Echo Show, with everything happening locally so that none of the images need to leave my home network.
Getting alerts for photo uploads
I can keep tabs on our shared album

My wife and I both upload our photos to Immich, and we have a shared album where we put our favorite family photos. Sometimes it can be a while before I check the album, only to discover that my wife has put a ton of great photos in there.
In Home Assistant, I set up a sensor that polls the Immich album every minute and checks how many photos it contains. I have an automation that sends me a notification when that number increases, but only if the photo was not added by me. There’s another automation that does the same for my wife.
Now whenever my wife adds new photos to the shared album, I get an almost instant notification. It’s similar to how the shared albums work in Apple Photos, but everything stays on my local network.
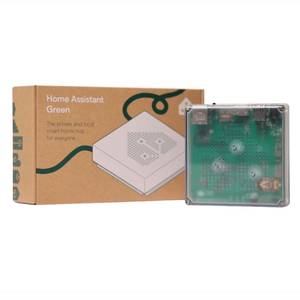
- Dimensions (exterior)
-
4.41″L x 4.41″W x 1.26″H
- Weight
-
12 Ounces
Home Assistant Green is a pre-built hub directly from the Home Assistant team. It’s a plug-and-play solution that comes with everything you need to set up Home Assistant in your home without needing to install the software yourself.
Immich and Home Assistant are a great match
I’ve used Immich for a while, but hadn’t really thought about adding it to Home Assistant as I couldn’t see any obvious reason to do so. I’m really glad I’ve done it now; my Echo Show now displays a perfect slideshow, and I can get notified whenever new images have been added to my shared album.


